Homemade Sauerkraut
I only remember Mom making sauerkraut a few times when I was growing up. We loved to eat it, but we didn’t love to smell it every time we walked through the kitchen! Mom used to talk about the “old German women” on her street when she was a kid (old was probably my age to a little girl!). There were three: one on each end and one right in the middle. They all canned their sauerkraut on the same summer weekend … and it “stunk up the neighborhood”, according to Mom.
Alas, that’s what women had to do then. As soon as cabbage was ready to pick, it was chopped and prepped for kraut making. Six weeks later, it was canned and stored for winter. It stands to reason everyone was on the same timeline! While I prefer to use local cabbage in the summertime, kraut is less stinky when you make it in winter … it takes a little longer, too.
If you want to learn how to make your own, check out my Making Sauerkraut page. Once you’ve made a batch, you’ll want to prepare it to be canned and stored. Check out Canning 101 for basic instructions. It’s important that you sterilize your jars, seals and lids before filling them. I usually do this in the canner itself, but you can use your dishwasher for large batches or if you’re canning several items in the same day. It’s easier for me to preserve in small batches … I don’t have the patience for much more!
Prepping Sauerkraut for Canning
Hold your nose as you take the lid off your sauerkraut … if it’s summertime, you’ll get a big whiff of stinky! Okay, it’s not really that bad, but JD complains about it nonetheless. Maybe I’m just used to that pungent smell.
Remove the kraut and all of its juice to a large stockpot, bring to a low boil and let simmer for about 30 minutes. I usually add additional brine in this process so I have enough to cover the kraut once I place it in mason jars. Once your kraut is cooked down a bit, carefully ladle it into sterilized mason jars. The kraut will probably get stuck … use the back of a wooden spoon to push kraut through the funnel if necessary.
Ladle brine over the kraut so you have about 1/2 inch head space at the top of each jar. Place the seal and lid on each jar, tighten the lid slightly … you’ll tighten fully after canning.
Use the water bath canning method
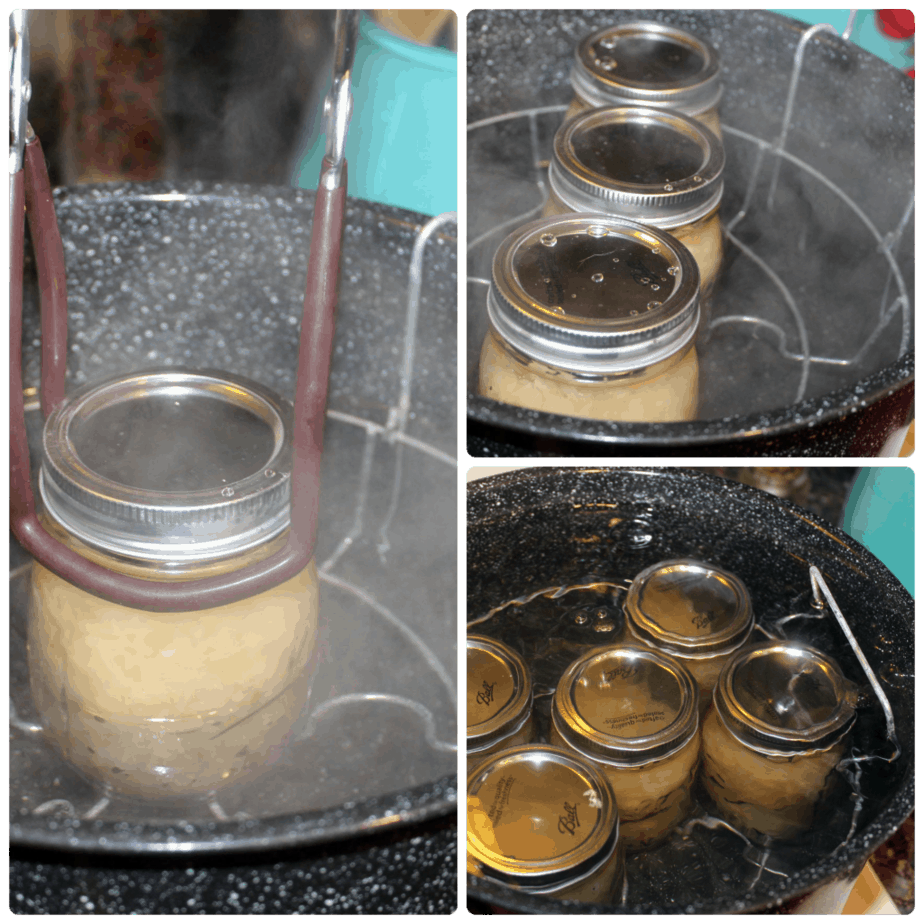
Place jars into the water bath … carefully. I will place one in the middle of the jar rack, then alternate sides to keep everything level. Otherwise, you might tip the basket when you lower it into the boiling water. Ouch! Once your basket is full, carefully grasp each wire handle with tongs or silicone pinch holders (I love these!) and lower it into the water. Place the lid on top and let it go for 15 minutes.
When done, use silicone tongs to reach in and grab the rack handles and carefully raise the rack back to its resting place. I use silicone because the tongs won’t slip like the all-metal type. Slipping means a falling basket which means hot water everywhere! Safety first.
Place each jar on a cloth dish drying mat and let cool.
Popping is good!
You’ll begin to hear them pop … this is good, it means the jars have sealed properly. I’ve never had a jar explode, but Mom and Grandma both have. It’s not fun when it happens … it’s funny years later, though!
When the jars have cooled, tighten each lid and store in a cool, dry place. Remember to rinse your kraut to remove the excess salty brine before you cook with it. Enjoy!


